SPF 006 - Cornice di Legno / SPF 006 - Wooden Frame
Facile - Easy

Questo/a opera è pubblicato/a sotto una Licenza Creative Commons.
VIDEO:
- {L1 - Gradient}
Create una selezione in alto larga quanto la larghezza della vostra immagine e alta almeno il 50% in più della dimensione desiderata.
Per esser chiari se volete una cornice con il bordo di 300pxs dovrete creare una selezione di 450pxs.
Create a new selection on the top of yur image, the width is the same of your image and the height must be your desidered dimension plus 50%.
Esample: You want the boredr to be maximum of 300pxs, You must create a selection with the height of 450pxs.
- Selezionate lo strumento "Sfumatura" e dalla paletta dei gradienti utilizzabili scegliete "Crown molding".
Riempite la selezione partendo dalla sua base e andando verso l'alto.
Select the "blend" tool and form the Gradient Menù choose "Crown Molding".
Fill the selection starting from the bottom to the top.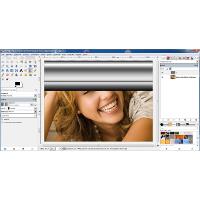
- Deselezionate, Seleziona / niente.
Deselect all, Selection / None.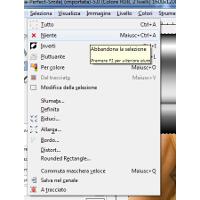
- Andate su: Filtri / Distorsioni / Coordinate Polari, usando i miei settaggi.
Go to: Filters / Distortion / Polar Coordinates, using my settings.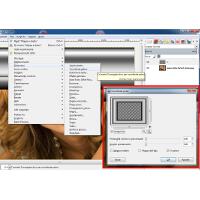
- {L2 - Optional wood effect}
Create un nuovo livello e create una nuova selezione usando il canale alpha della cornice, basta fare tasto destro sul livello della cornice ( in questo tutorial L1 ) e scegliere "Alpha a Selezione". Create a new layer and create a new selection using the frame's alpha channel, make a right click on your frame level ( in this tutorial I call it L1 ) and choose "Alpha to selection".
- Selezionate lo strumento secchiello e scegliete come tipo di riempimento "Riempi con il motivo" e usate "Pine?".
Choose the bucket tool with the fill option of: "Patern fill" and choose "pine?" as pattern.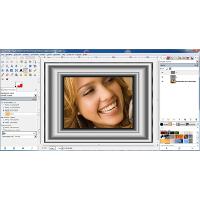
- Riempite la selezione, ora andate su: Filtri / Mappa / Mappa a Sbalzo e usate queste impostazioni o quelle di vostro gradimento.
Fill the selection, go to the: Filters / Map / BumpMap and use my setting or same of your choice.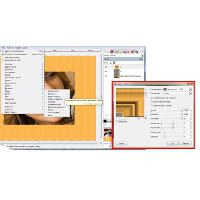
- Come tocco finale, andate su: Filtri / luce e Ombra / Drop Shadow.
As Final Touch, go to: Filters/ Light and Shadows / Drop Shadows.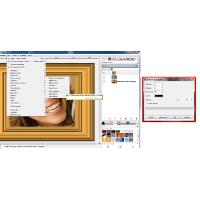
- Deselezionate, Seleziona / niente.
Deselect all, Selection / None.
Final Result
Ecco il risultato finale - Ecco the Resulting Image.
Gimp XCF
Potete scaricare il file originale per il Gimp ( XCF ) da questo link:
You can download the original Gimp File ( XCF ) from this link:


